How do you fix a broken nail? Arrggh! Everyone hates broken nails! I mean, you have been growing them long to style them! Yes, you’ve been maintaining it pretty until it got cracked! I know, it’s a little frustrating! The option you have is to cut every nail short to follow the length of the broken nail!
It’ will take a few weeks before you get the desired length! Breaking nails are not practical! It just takes too much time to grow back!
Fortunately, there’s a fix! I mean, there are some fixes! So, don’t cry now (sobs), here’s what you can do to repair them! Generally, a crack is easier to repair than a broken nail, but they follow the same principle.
1. Nail Glue And a Teabag
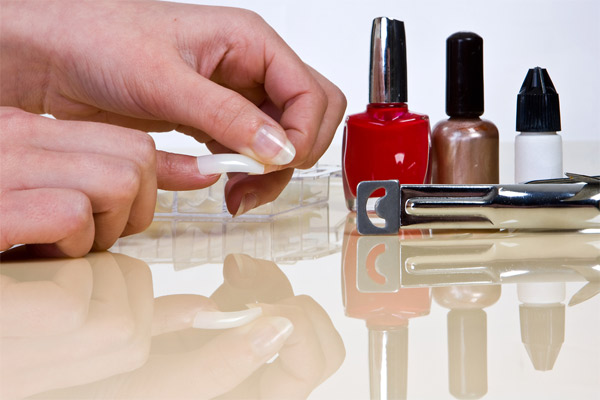
A teabag is something you already have at home so you can immediately proceed with this method without waiting for materials to be shipped to your home! The idea is to us the tea bag as a mesh that will bridge the broken nail. You will need a nail glue, nail files, tweezer, and a teabag. All of which you may already have at home!
Wipe your tears and stop crying out your frustration over your broken nail! We’re going to fix it!
Step 1
Cut a portion of the tea bag enough to cover the crack on your nail.
Step 2
File your nail at the top of the crack, not on the crack so that the glue would stick better. Do it also to the broken nail.
Step 3
For a crack, apply some glue on the surface of the nail and wait for it to dry a bit. Then place your cut-out teabag over it and apply another layer of glue making sure that teabag fabric is completely soaked.
Step 4
For broken nails, place the teabag over your nail and apply some glue and wait for it to set. Now, dab some nail glue on the other edge of the tea bag where you will connect the broken piece of nail. Using your tweezer, place it on the wet teabag and wait for it to set for a few seconds.
Add another layer of nail glue to reinforce the first layer of adhesive. You can try going for another layer if you want to make it more sturdy but it will thicken your nail a bit.
Step 5
File the edges and smooth out the excess glue. Now you’re ready to apply some nail polish on!
2. Broken Nail Repair Kit

What do you know? It seems like you are not the only one who has this problem! In fact, it’s a rampant problem that some company invented something you can use to fix your nail and manufactured them in a commercial level! And guess what, they are making money out of it because a lot of other ladies keep breaking their nails too!
It’s handy to have this at home and order it even before you get your nails broken so that you have it any time you need it!
Basically, it follows the same methodology with the previous method. The difference is, the kits you can buy have some cure spray to harden the glue faster. And instead of cutting teabags, these kit include some adhesive silk mesh that you can easily stick in your nails!
Related: LET YOUR HANDS DO THE TALKING! MANICURE GUIDE
3. Make Your Own Nail!

In some cases, broken nails mean torn corner piece of the nail which got lost in the mud (what are you doing in the mud with all those pretty nails?!). This means that there is nothing to connect with the broken nail! Now you’re thinking of cutting all the other nails to its length, you poor thing!
Don’t do it yet, you can make your own nail out of the some nail glue! Yes, all you need is some nail glue (or a cracked nail repair kit!)!
Step 1
Place a teabag, or a silk mesh adhesive the size of your nail covering the length of the torn nail. Make sure you stick the mesh 3-5mm on your nail for more durability. Don’t worry about the shape yet.
Step 2
Apply some nail glue from across the whole nail. Yes, cover the whole nail. This acts as the anchor for your prosthetic nail! Apply some on the underside of the nail too. This will make your crafted nail look and feel more natural.
Step 3
Let it dry or cure it with a curing spray and apply another layer of glue. Let it dry.
Step 4
By this time, you can feel that the artificial nail is already hard. Almost as hard as your original nail. See for your judgment if you will need another layer.
Step 5
Use a nail clipper to trim off the sharp edges then use a nail file to smooth the edges. Now you’re ready to apply some nail polish!
Related: 7 WAYS ON HOW TO MAKE YOUR NAILS GROW STRONGER AND STAY LONGER
If all your attempts fail, you can always fashion some false nails. Well, they may feel a little unnatural and a bit awkward, but for one occasion you need to grace with a perfect nail, a false nail will do a good job!
Growing nails take quite a lot of time so you should be careful as it gets easier to break as it grows longer! Be mindful about how you move around with your hands. Use some rubber gloves washing the dishes. Soaking your nails too long with detergent and water softens and sucks up the moisture in your nails.
Moisturize after washing your hands as soaps and hand wash can take some moisture away from your nails too. Lastly, do not make a habit of picking out things and making your nails some kind of tool to rotate little switches! You are only increasing the likelihood of breaking your nail! Keep your nails safe!
“Hope you find the post helpful and we excited to hear what you think of it!”