Everyone wants to look good and feel good, and for some of us, that means fancy hair jewelry or fabulous hair accessories. Unfortunately, the kinds that are actually pretty and will not fall apart in one use are not that cheap.
But why do you have to spend $20 to $30 on something you can actually make? Yes, you read that right! Here are my favorite do it yourself hair accessories that are easy, cost much, much less and also make outfits come together perfectly!
1) How To Make Hair Accessories At Home
In my opinion, making hair accessories yourself gives the finished products a personal touch. DIY hair accessories make cute additions to outfits and can also be used to make a statement. Even better, you won’t have to spend as much!
Here’s how to make hair accessories that suit your style and taste, that are cheap and can be made with stuff you may already have at home.
1. Golden Branch Hairpins

Secure a bun, tuck your hair to one side, or simply add hairpins to a simple outfit for a fun boho vibe! These gold branches are super easy to make and won’t require much. Also, one DIY-er noted they add a whimsical yet edgy feel!
What You’ll Need:
- Artificial or dried branches
- Gold Spray paint
- Large bobby pins (either gold or silver)
- Wire cutter
- A piece of cardboard
- Craft Adhesive
Here’s How To Do It:
-
1. Using a wire cutter, cut your branches to fit your jumbo pins. You can make them a little bit longer, so the branches stick out on one or both ends.
2. Use spray paint to color your branches gold. Allow these to dry.
3. Stick your pins on the flap or side of a cardboard box, with the longer, straight side facing up. You can also use a piece of cardboard weighted on the edge of a table.
4. Using craft adhesive, glue the sticks on the straight side of the pins. You can bend the twigs a little so that they lie flat on the pins, or you can leave them be for a natural effect.
5. Let the glue dry and make as many as you want!
2. Flower Comb

One of the most popular trends in DIY Hair Accessories are flower crowns. If you want to stand out but still get the cute artsy look from flowers and ribbons, this flower comb is perfect for you!
You can wear it anywhere from music festivals to formal events like weddings, photo shoots, engagements, or just for fun!
What You’ll Need:
- Silk or artificial flowers
- Ribbons of various thickness, texture or colors.
- Snippers
- Hot glue gun
- Card stock (this will be used for structure, so get a subtle-colored one)
- Hair comb of your desired size
Here’s How To Do It:
-
1. Cut a piece of card stock that’s at least 4” wide and long enough to extend about a quarter of an inch longer than the comb. Fold it in half.
2. Apply a generous line of hot glue to the comb and attach it to the lower edge of the folded card stock.
3. Press the card stock’s two open sides together to hide the top of the comb. Cut off the excess, if any.
4. Cut some ribbons and glue them on the card stock to hide it. Feel free to layer them on top of each other for depth and design.
5. Cut the flowers at the base, removing the stalks. If you’re using smaller flowers, you can leave a few centimeters of the stalk.
6. Using hot glue, fasten the flowers on top of the ribbons. Arrange them as you see fit.
7. Fill any gaps or holes between flowers with smaller ones, buds, or other designs.
8. Allow this to dry completely and adjust if necessary. Have fun!
Related: THE BEST HAIRSTYLES OF 2017 THAT WILL GIVE YOU A COMPLETE MAKE OVER
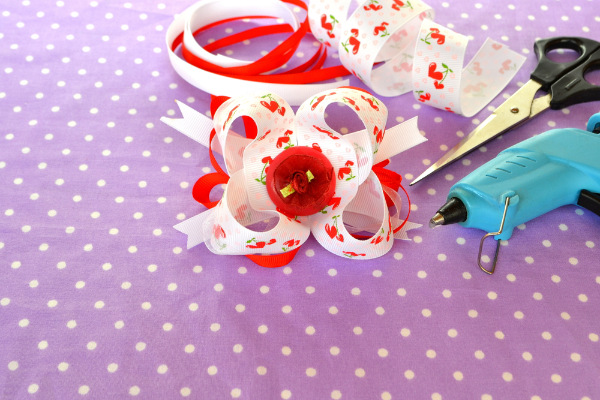
3. Five Petal Ribbon Flower Bows

These cute little flower bows are super easy to make. You can also use different ribbon widths for various flower sizes.
What You’ll Need:
- Metal Washers
- Woodburning Tool
- Different colored ribbons of various thickness
- Needle and upholstery thread
- Glue gun (optional)
- Accents (optional)
- Barrettes, large pins, or a plain black elastic.
How To Do It:
-
1. For a ribbon that’s 1 ½” wide, use a same sized washer. Position the washer on the ribbon and trace one end of the washer on the ribbon with a wood burner. This will cut the rounded end of each petal and seal of the edge to prevent frays.
2. Cut the ribbon to length, about the same length from the rounded tip of as the width.
3. Do this again to make five petals.
4. Stitch the petals side by side together and connect the first and last one.
5. Pull the thread tight. Tie the stitch at the back of the ribbon flower and cut the excess thread off.
6. Add embellishments or accents at the center, or leave the flowers as is.
7. Stitch or use a glue gun to secure the flowers on a plain black elastic, a barrette, or large pins.
4. Fabric Head Scarf Or Wrap

Make these for yourself or as gifts to loved ones, they take very little time to make and also gives a personalized feel. Ditch tight-fitting headbands with these hair scarves to tame unruly hair or to add a bang to a messy hair style.
What You’ll Need:
- Different colored scrap fabrics
- Tape measure or ruler
- Sharp Scissors
- Sewing machine or needle and thread
- Wire cutters and floral wire (optional)
How To Do It:
-
1. Measure around your head to help you decide on how long you want the scarf to be and mark this on the fabric.
2. Cut two strips of fabric; you can also fold it in half to make cutting easier.
3. Use a ruler to mark an angle at one end. Cut off the corners from this end.
4. Using a half inch seam, sew the pieces of fabric together, leaving two inches open before the edge of the last corner. Use this opening to pull the fabric right side out.
5. Stitch a loop of wire in the angled ends if you want the “ears” to stand up. Tie the headband around your head.
6. You can also simply sew the ends of the scarf after turning it inside out. Make different lengths and widths to experiment. You can also use various fabrics, even metallic ones for a nice touch.
Related: 5 EASY OLD FASHIONED HAIRSTYLES THAT ARE ALWAYS IN STYLE
5. Beaded Crystal Headpieces

If you’re going for high fashion, stylish but bold, avant-garde looking hairstyle, these crystal head pieces that ROCK (literally) are the way to go!
What You’ll Need:
- Turquoise or Quartz crystals or beads
- A barrette or hair comb
- Craft glue
- Scissors
- Leather fabric
How To Do It:
-
1. Arrange turquoise beads or quartz crystals on a table to plan how you’re going to place them.
2. Put a sparkly or metallic leather fabric at the back of a barrette or comb to serve as the background for quartz crystals.
3. Use craft glue to stick the crystals or beads on the barrette or comb. Allow to dry.
Congratulations! You have made your own hair accessories! Of course, there are tons of other attractive and easy to make hair accessories that you can find from different sources. With these cheap and charming pieces, you’ll surely be a head-turner!
“Hope you find the post helpful and we are excited to hear what you think of it!”